Part science, part biology, part art, bread baking can be intimidating and results unpredictable at times. The combination of yeast with water and flour creates a living organism that sometimes has a mind of its own. In spite of that, I've found making bread to be immensely rewarding. Not only is the end product delicious, the process of mixing together a few basic ingredients using methods that have't really changed in thousands of years ago feels grounding and life sustaining. Using a natural leavening agent, commonly referred to as "sourdough", just makes the whole process that much more rewarding.
It's only been in the past hundred years or so that we started adding granulated or commercial yeast to our bread dough as a leavening agent. Before that, ALL leavened (risen) bread was "sourdough". The term simply refers to the process of adding an active yeast culture to a mixture of flour and water and allowing the fermentation process to achieve the leavening. Bread made with a "mother" or "sourdough starter" requires a longer process and therefore a bit of planning, but it needs (or kneads?) less hands-on time and creates bread that is crispy, more flavourful and easier to digest.
Like many art forms, learning to make naturally leavened bread takes practice. The recipe below is intended for folks new to the process and can be a starting point for exploring other recipes. I won't go into a lot of detail about bakers percentages, hydration, crumb and dough temperature -- these are all interesting aspects of bread baking to consider as you develop capacity and get to know your starter and the process better. But the best way to learn something is to do it. Jump in. Have fun experimenting, expect mistakes and enjoy the results. You'll find the efforts worth it!
Mise en place: Preparing to bake
Making basic, naturally leavened bread requires very little in terms of equipment. A bowl and spoon will get the job done for mixing and bulk fermentation (rising), and while a bannetton or basket is handy for rising the shaped loaf, you can use a bowl or simply free-form the loaf. For baking, I would highly recommend a Dutch Oven, but a pizza stone or cookie sheet will work too. Parchment paper makes life easier, and I would encourage beginners to use it. One tool that I feel is essential to successful bread making is a scale. In fact, I think it's so important I have not included volume measurements in the recipe below. If you don't have a scale, scurry on out and get one. It's worth the investment.
Step 1: Feed Your Starter
Approximately 24 hours before you want fresh bread.
 |  |  |
You can make your own starter by capturing wild yeast in a simple mixture of flour and water and letting it stand for a few days, but the easiest way to begin is by getting a little bit of starter from someone else. I've got both, but my go-to starter came from my sister-in-law in the Yukon and purportedly travelled over the Chilkoot Trail with a "Sourdough" (prospector) during the gold rush over a hundred years ago. During a visit to Whitehorse, I put a few tablespoons into an old pill-bottle and carried it home with me. You'll find that different starters have slightly different flavours, so you may want to play around with them.
Maintaining your starter doesn't need to be a complicated process of feeding and discarding. Only a small amount is needed to keep the yeast and bacteria active. Here is my recommended method for maintaining starter.
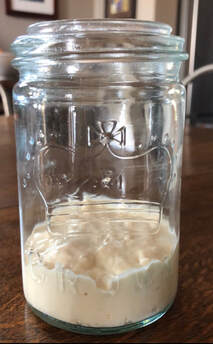
Add a few tablespoons (50 grams) starter to a clear plastic tub or jar. This is your base and all you need to bake unlimited loaves of bread. There is absolutely no need for huge jars of starter and a restrictive regimen of maintenance. Store it in the fridge and take it out to warm up and feed only when you are planning to make bread. This avoids unnecessary feeding and discarding.
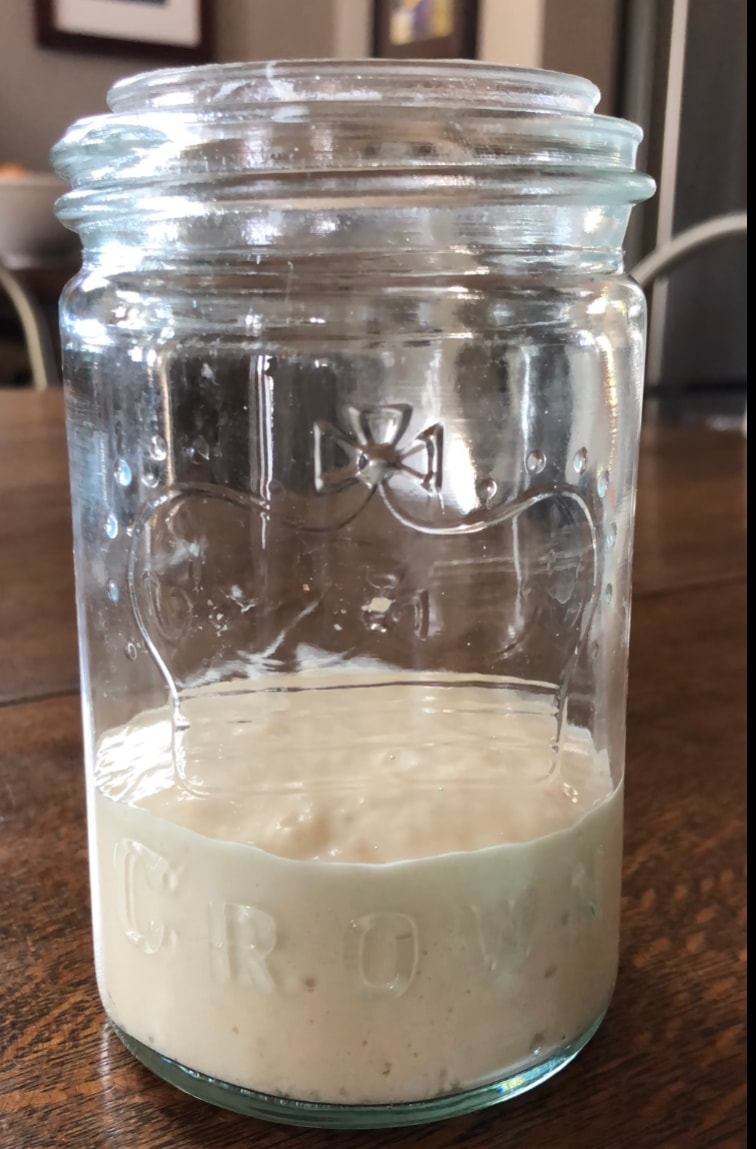
The day before you want to bake bread, remove the starter from the fridge and add equal amounts (by weight) plain unbleached flour and room temperature water. For a single loaf recipe, I use 50 grams of each. (See note below about measuring.) Stir and let stand on the counter. It should begin to bubble up over the course of a few to as much as 12 hours (depending on when you last used it and how warm your house is.) This will provide you with the 100 grams of active starter to use for the dough and leave you with 50 to return to the fridge for next time.
Maintaining your starter doesn't need to be a complicated process of feeding and discarding. Only a small amount is needed to keep the yeast and bacteria active. Here is my recommended method for maintaining starter.
Add a few tablespoons (50 grams) starter to a clear plastic tub or jar. This is your base and all you need to bake unlimited loaves of bread. There is absolutely no need for huge jars of starter and a restrictive regimen of maintenance. Store it in the fridge and take it out to warm up and feed only when you are planning to make bread. This avoids unnecessary feeding and discarding.
The day before you want to bake bread, remove the starter from the fridge and add equal amounts (by weight) plain unbleached flour and room temperature water. For a single loaf recipe, I use 50 grams of each. (See note below about measuring.) Stir and let stand on the counter. It should begin to bubble up over the course of a few to as much as 12 hours (depending on when you last used it and how warm your house is.) This will provide you with the 100 grams of active starter to use for the dough and leave you with 50 to return to the fridge for next time.

If, after feeding, it doesn't bubble up and rise, you may need to do another feeding, In this case, you will have discard. Remove all but 50 grams of starter and feed again as noted above.
Starter can last a VERY LONG TIME in the fridge. If you haven't used it for a while, you may notice a grey, smelly liquid has formed on top. This is normal and doesn't mean that your starter has died. You can pour off the liquid "hooch" or mix it in, whatever you prefer, and feed the starter as usual. You may have to feed it a couple of times to get it back to being active enough to use. Starter that is mouldy or has a pink or orange colour should be discarded.
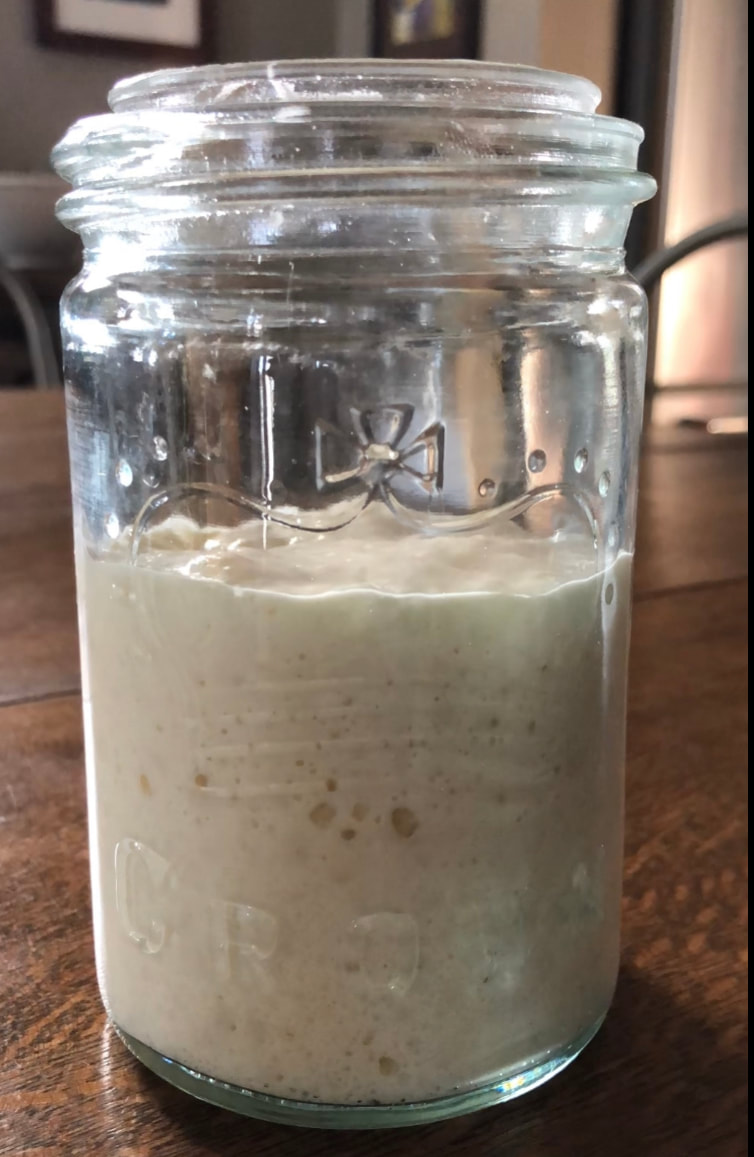
Get to know your starter. You can test to see if it's active enough to use by floating a small spoonful in a cup of water, but generally, you'll be able to tell by how it looks and feels if it's ready to use.
Starter can last a VERY LONG TIME in the fridge. If you haven't used it for a while, you may notice a grey, smelly liquid has formed on top. This is normal and doesn't mean that your starter has died. You can pour off the liquid "hooch" or mix it in, whatever you prefer, and feed the starter as usual. You may have to feed it a couple of times to get it back to being active enough to use. Starter that is mouldy or has a pink or orange colour should be discarded.
Get to know your starter. You can test to see if it's active enough to use by floating a small spoonful in a cup of water, but generally, you'll be able to tell by how it looks and feels if it's ready to use.
Step 2: Combine Ingredients5 minutes active time. In a large bowl, combine: 350 grams water 100 grams active starter 500 grams bread flour * 8-9 grams salt Mix together well using a spoon, bowl scraper or your (wet) hands. Once all the ingredients are well combined, cover (I slide a dinner plate over the top of the bowl, but you can use a wax wrap or cling wrap.) Let it rest 1/2 before moving to step 3. | 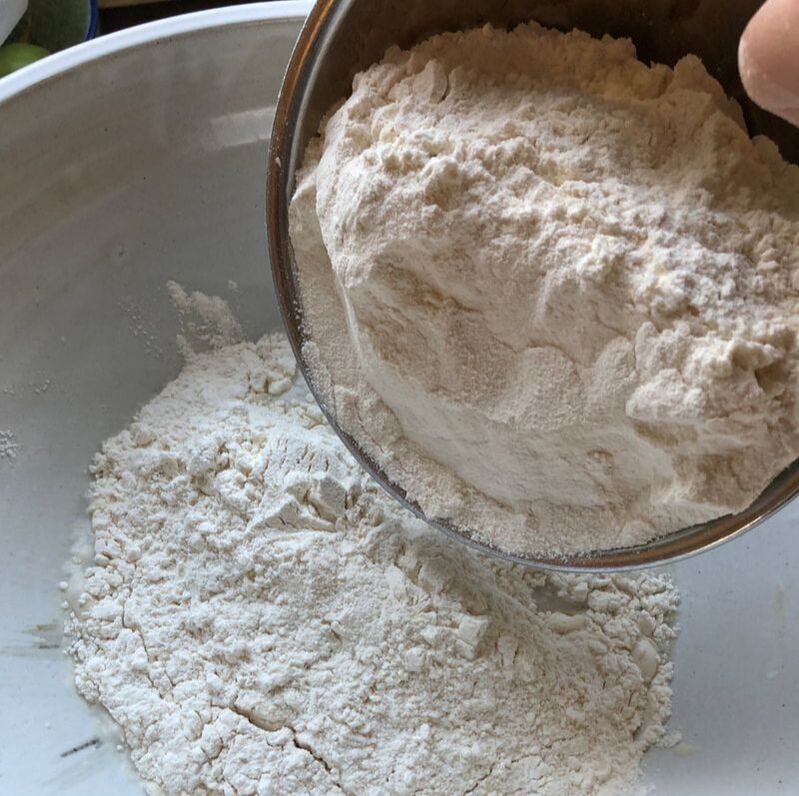 |
* You can use various types of flour as long as the total weight adds up to 500 g. I highly recommend using bread flour or a portion of bread flour since it has a higher protein content. This means more gluten and more gluten means better bread.
Step 3: Stretch and Fold
2 minutes active time x 2. One hour total resting time. If you're in a rush, you can do just a single stretch and fold 1/2 hour after mixing.
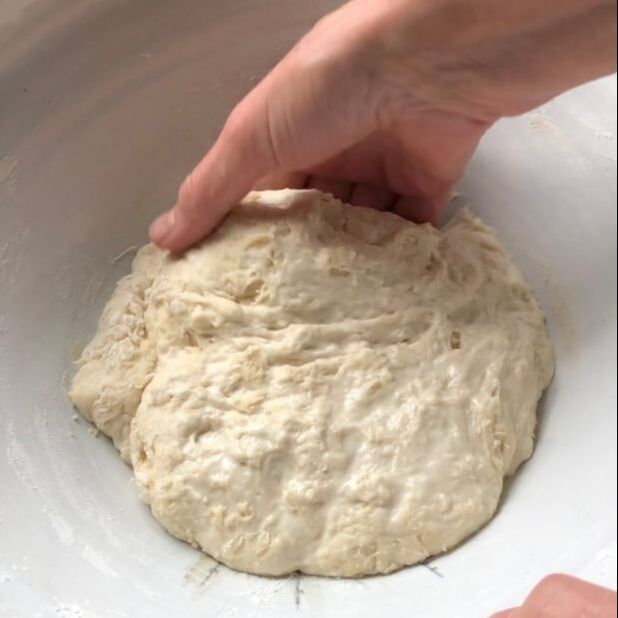 | 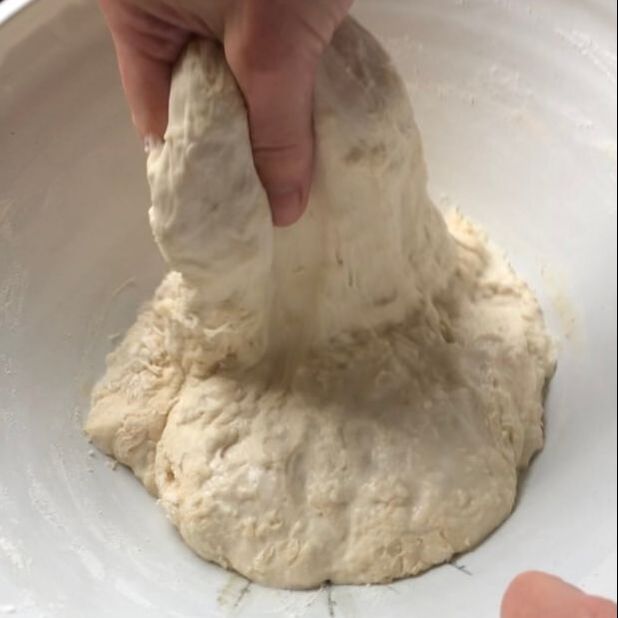 | 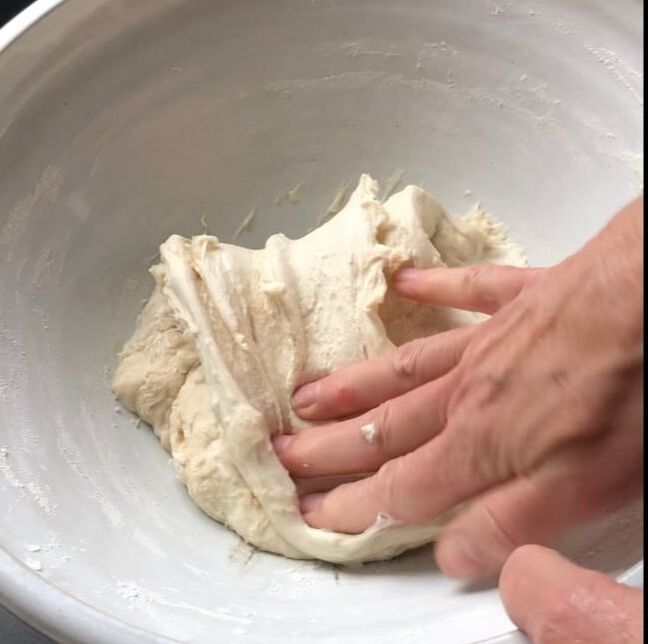 |
After 1/2 hour, stretch and fold the dough by taking a handful from one edge, stretching it up and folding it into the centre. Repeat four times, moving to a new "corner" of the dough each time. Turn the dough ball so that the top is on the bottom and let rest covered for another 30 minutes before repeating with a second stretch and fold. Cover. Wet hands make this task easier.
Step 4: Bulk Fermentation
4-10 hours inactive time (watch the dough, not the clock)
This is the stage that allows the yeast and bacteria to get the job done, creating better flavour and strengthening the gluten. I usually mix my dough in the evening and leave it on the counter overnight if my house is cool. In warmer weather, I adjust my baking schedule and check it after a few hours.
Step 5: Shaping and Rising (proofing)
5 minutes active time. 2 hours to 10 hours inactive rising time.
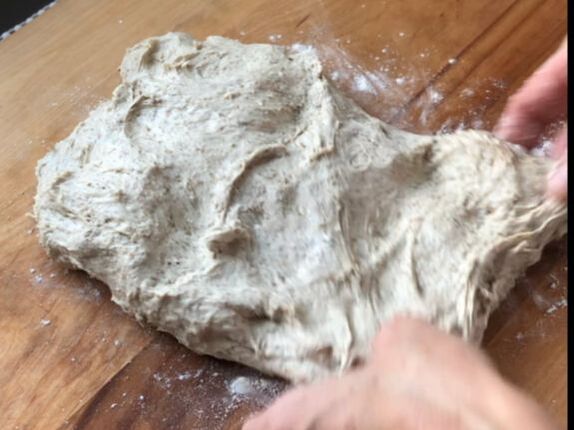 |  | 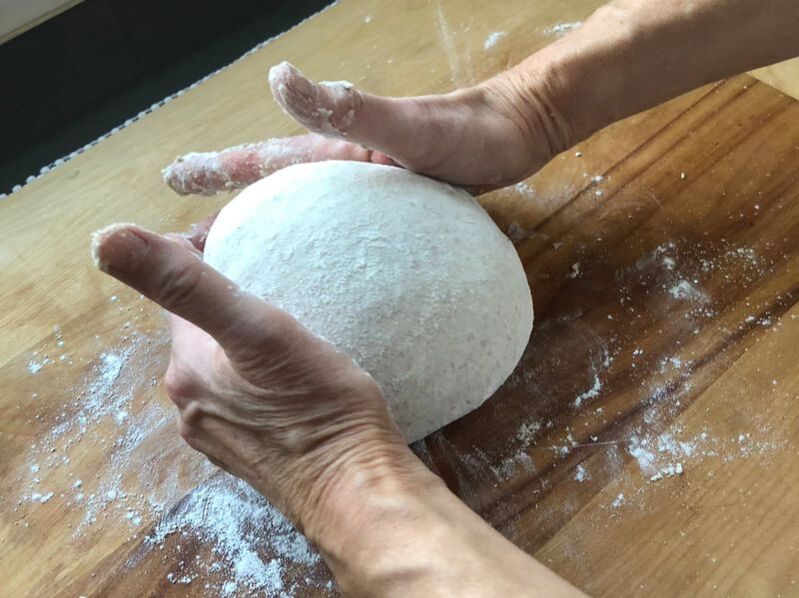 |
Sprinkle a bit of flour on the counter and scrape out the dough. Starting at the top, grab the dough and pull it up and then into the middle of the ball. Do the same to the bottom. Fold one side over the middle and then the other. Turn your dough over so the seams are at the bottom. Using a tucking and pulling motion, (assisted by a bench scraper if you have one), shape the dough into a ball. This action creates tension on the surface of the dough that will help it to keep its shape when rising and baking. Place the "boule" top side down into a rising basket (bannetton) that has been liberally sprinkled with rice flour, or top side up on a piece of parchment paper. Cover and let rise about two hours or refrigerate and rise overnight. Dough will be ready to bake when it is puffy and light. If you poke it with a finger, the dimple should bounce back very slowly and not completely fill in. Different flours will require different rising times as will the temperature in your home.
| I have begun "retarding" my loaves for more consistent bakes. After shaping and placing in a proofing basket, I cover the dough with a cloth and put it into my fridge overnight. This slows down the rising. In the morning, I pull it out and let it warm up a bit on the counter before baking. |  |
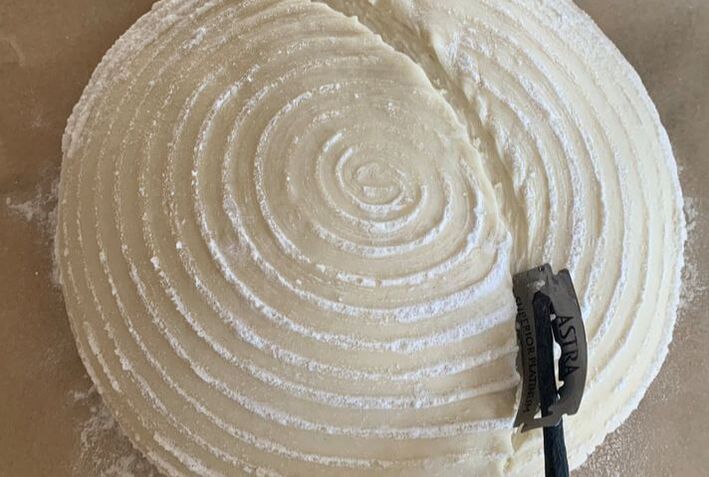 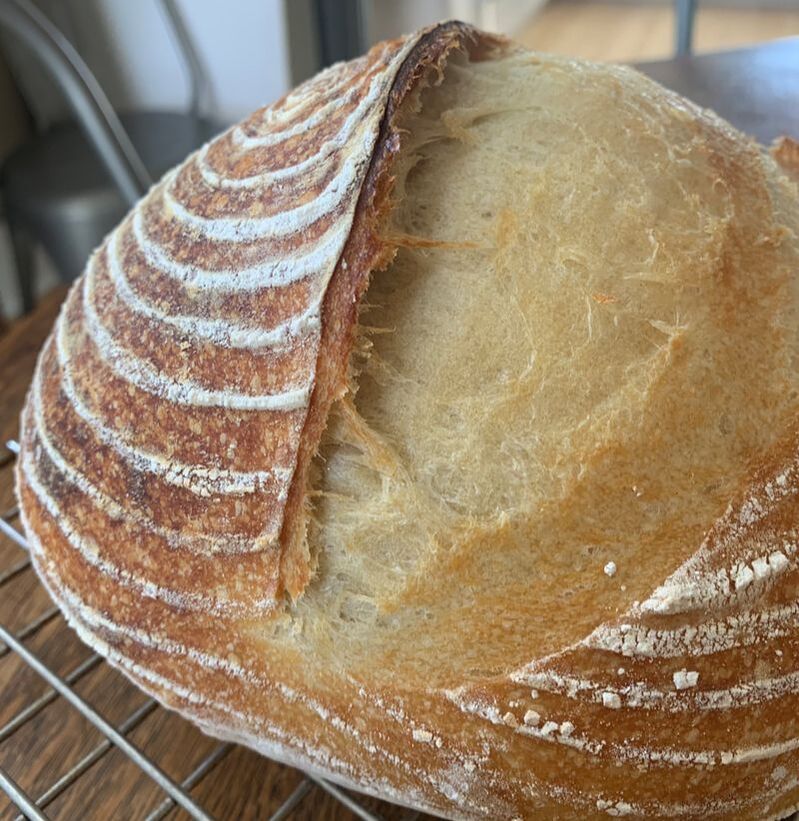 | Step 6: ScoringDo immediately before baking once dough has risen and oven is hot. We score bread not only to make it pretty, but to allow someplace for what's called "oven spring" which is the final expansion of the dough before the heat of the oven stops the rising action by killing the yeast. Use what you've got - a razor blade on a lame, a very sharp knife, or even scissors, but make sure you score the bread or it will find its own place to expand and you'll end up with a bulging crust. Once the dough has risen and your oven (and cast iron pot if using) is hot and ready to bake, turn your dough out onto your baking pan or a piece of parchment (recommended). As a beginner, score by making one deep cut slightly on an angle and off to one side of the loaf. As you get more comfortable with sourdough, you can get fancier with your scoring. You'll notice the "ear" on the loaf to the left, and how the bread has expanded along the scored line. |
Step 7: Baking
Oven preheat - 20 min to 1/2 hour, baking time 40 minutes.
I recommend baking in a Dutch oven or cast iron pot. If you don't have one, see alternative baking method below. Preheat both the oven and the pot to 450F (230C). Make sure the pot is well-heated. This preheating can take 20 minutes or up to 1/2 hour depending on your oven.
Place the scored boule carefully into the preheated pot, cover and return to the oven. Bake for 20 minutes. Uncover and bake for another 20 minutes. Oven temperatures vary, so get to know yours and adjust your baking time and temperature accordingly.
Place the scored boule carefully into the preheated pot, cover and return to the oven. Bake for 20 minutes. Uncover and bake for another 20 minutes. Oven temperatures vary, so get to know yours and adjust your baking time and temperature accordingly.
Baking without a Dutch Oven
A Dutch oven or cast iron pot creates a more consistent environment for baking bread because it traps moisture during the first part of the bake allowing for better oven spring (since the crust stays softer longer). If you don't have a Dutch oven, you can use a pizza stone (preheated) or a baking sheet (not pre-heated). In this case, you will need to add moisture to the oven by preheating a baking pan and adding 1/2-3/4 cup of hot water to it at the beginning of your bake to create steam. You can also place a cookie sheet on a rack above your bread while it's baking that will reflect the steam back down onto the bread, simulating the same effect as the Dutch Oven. Results will be different, but still good.
A Dutch oven or cast iron pot creates a more consistent environment for baking bread because it traps moisture during the first part of the bake allowing for better oven spring (since the crust stays softer longer). If you don't have a Dutch oven, you can use a pizza stone (preheated) or a baking sheet (not pre-heated). In this case, you will need to add moisture to the oven by preheating a baking pan and adding 1/2-3/4 cup of hot water to it at the beginning of your bake to create steam. You can also place a cookie sheet on a rack above your bread while it's baking that will reflect the steam back down onto the bread, simulating the same effect as the Dutch Oven. Results will be different, but still good.
Step 8: DEVOUR!!
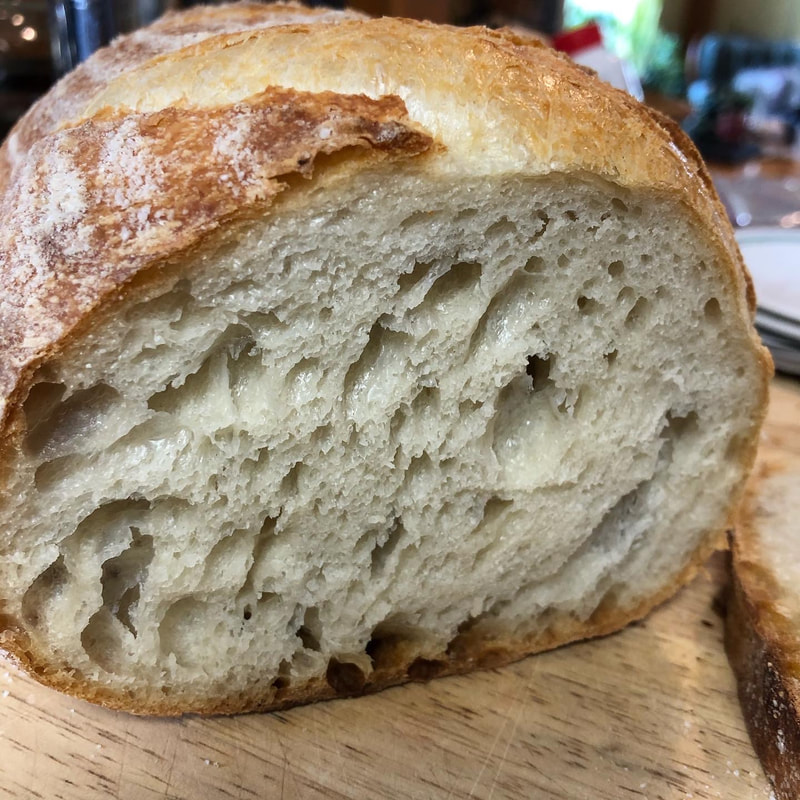
It's tempting to cut into a freshly baked loaf right away -- it smells so good!! But doing so may result in compressing the bread making it gummy. Wait at least 1/2 hour before slicing. Allow bread to cool completely before storing. Keep in a paper bag if eating within a day. Recommended storage is a wax wrap or bread box. Sourdough bread also keeps will in the freezer for a few months, although it will lose that crispy crust. Don't keep bread in the fridge - while it may delay the growth of molds, refrigeration dries out bread and it goes stale much more quickly.
Fitting Bread Baking into Daily Life
I've settled into a bit of a bread-baking routine that can easily be adapted to fit around anyone's schedule. Based on the timing that works in my home environment, my schedule looks like this:
| OPTION ONE Day One Morning - feed starter, leave someplace warm Evening (8:00 ish) - mix dough, stretch and fold x 1, bulk ferment on counter overnight Day Two Morning - shape dough, place in proofing basket Option One: - let rise on counter approx. 2 hours, bake Option Two: - let rise in fridge all day, take out after work, bake in the evening/supper time | OPTION TWO Day One Daytime - remove starter from fridge Evening after dinner - feed starter - leave on counter Day Two Morning - mix dough, stretch and fold, bulk ferment on counter Evening - shape dough, place in proofing basket, put in fridge overnight Day Three Early morning - remove dough from fridge Mid morning - bake |
Keep in mind that these schedules assume a frequently used, active starter. If your starter hasn't been sued for a while, it might need longer to revive.

 RSS Feed