Jean E. Pendziwol
  • Home
  • Books
    • The Lightkeeper's Daughters >
      • Book Club Questions
    • Books for Kids >
      • Picture Books
      • Dragon Safety
  • Blog
  • Resources and Activities
  • About
    • Contact
    • Events
    • Other works
  • Food Blog - Bread Around the World

Falafel with Grilled Pita

9/6/2020

2 Comments

 
Picture
We stocked up on dried beans of all sorts as part of our pre-COVID-19 quarantine provisioning. I often use canned chick peas to make hummus or to add to curries and salads, but I had only ever used dried on canoe-camping trips. I made this felafel recipe a couple of times, and the freshness of the re-hydrated (but uncooked) peas makes a tasty difference.
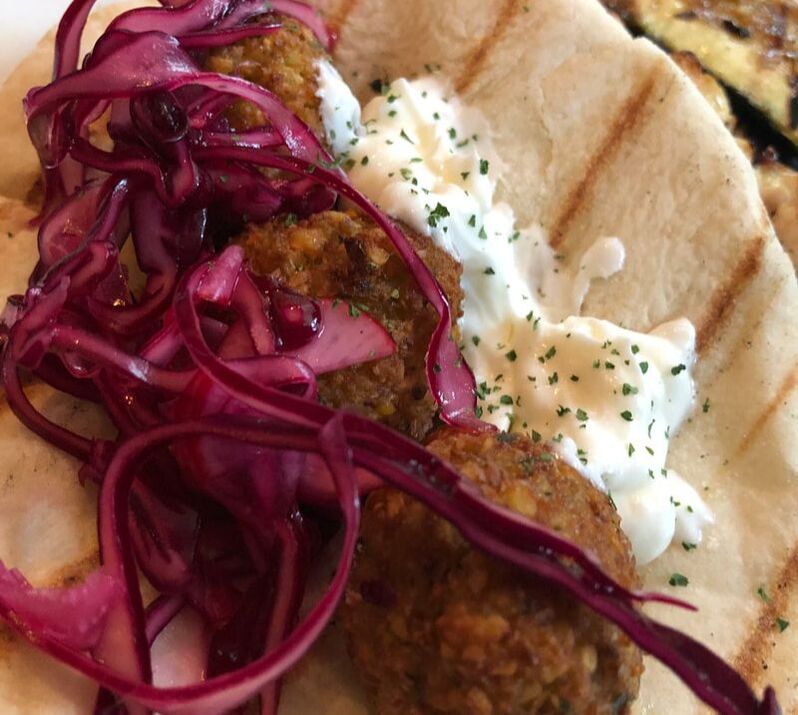
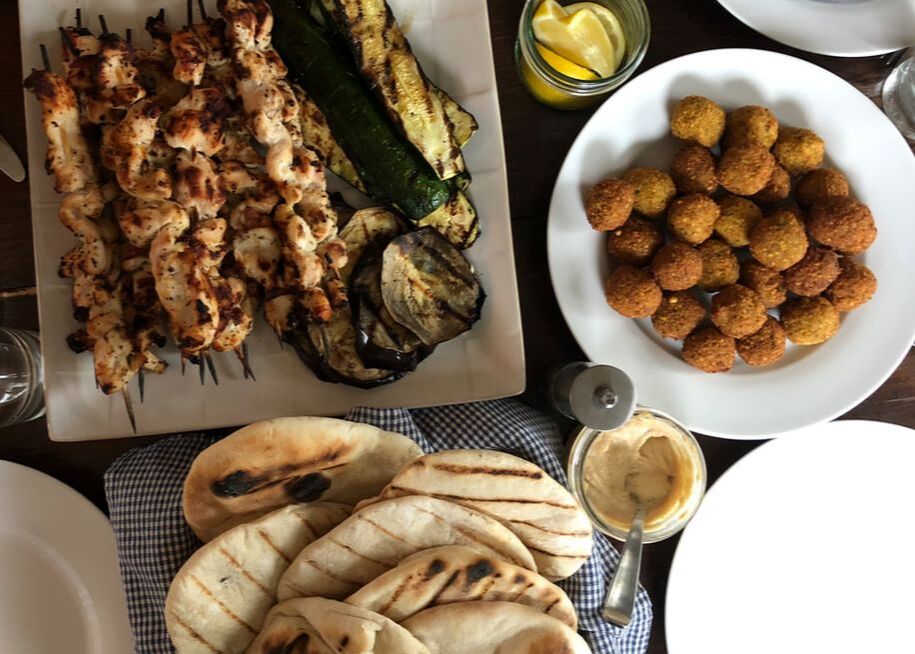
We served up the felafel with freshly grilled pita bread, souvlaki, grilled zucchini and eggplant, homemade red cabbage pickle, tahini sauce and greek yogurt. The homemade pita was definitely worth it!
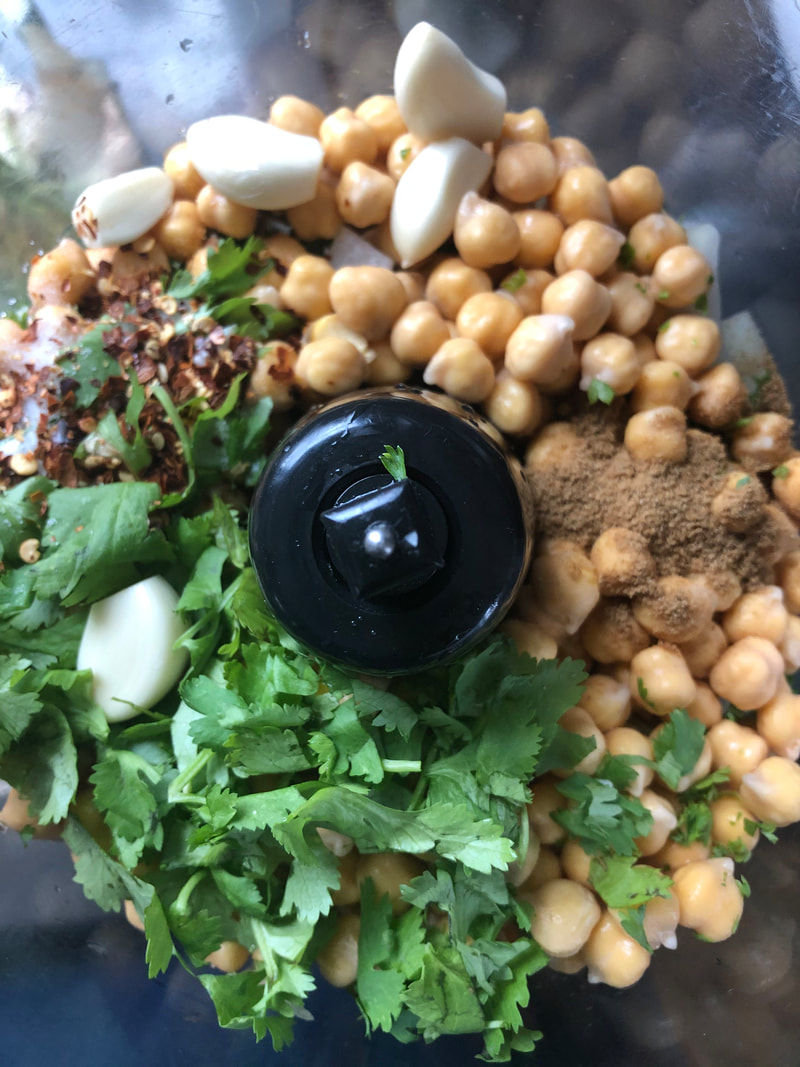
Easy Felafel

1 cup dried chickpeas, soaked overnight, and drained (or one can chick peas, drained)
1/2 large onion, roughly chopped (about a cup)
2 tablespoons fresh parsley
2 tablespoons fresh cilantro
1/2 teaspoon salt (or to taste)
1/2-1 teaspoon dried red pepper flakes
4 cloves of garlic
1 teaspoon cumin
1 teaspoon baking powder
4-6 tablespoons flour
  1. Place chickpeas onions parsley, cilantro, salt, hot pepper, garlic, and cumin in food processor with chopping blade attached. Process until blended but not pureed. You may want to experiment with how much you process. I found I liked them well processed instead of chunky.
  2. Sprinkle in the baking powder and 4 tablespoons of the flour on top of mixture and pulse. The dough should be easy to work into small balls without sticking to your hands. Add more flour if needed. Scrape into a bowl and cover; refrigerate for several hours.
  3. Heat 3 inches of oil to 375ºF in a deep pot (or use a deep fryer if you have one). Roll some of the chickpea mixture into a ball about the size of a walnut as a test. Drop it into the hot oil -- If it falls apart, add a little more flour to the mixture.
  4. Fry about 6 balls at a time for a few minutes, turning over to cook both sides. Drain on a cooling rack over a cookie sheet or drain on paper towels.
  5. Stuff pita (we tended to not bother splitting them open) with falafel balls, and your favourite toppings. These can include chopped tomatoes, onion, green pepper, or pickled cabbage. We also drizzled ours with tahini sauce, greek yogurt and freshly squeezed lemon juice. Tzatziki would be super tasty too!
Picture
Picture
Picture

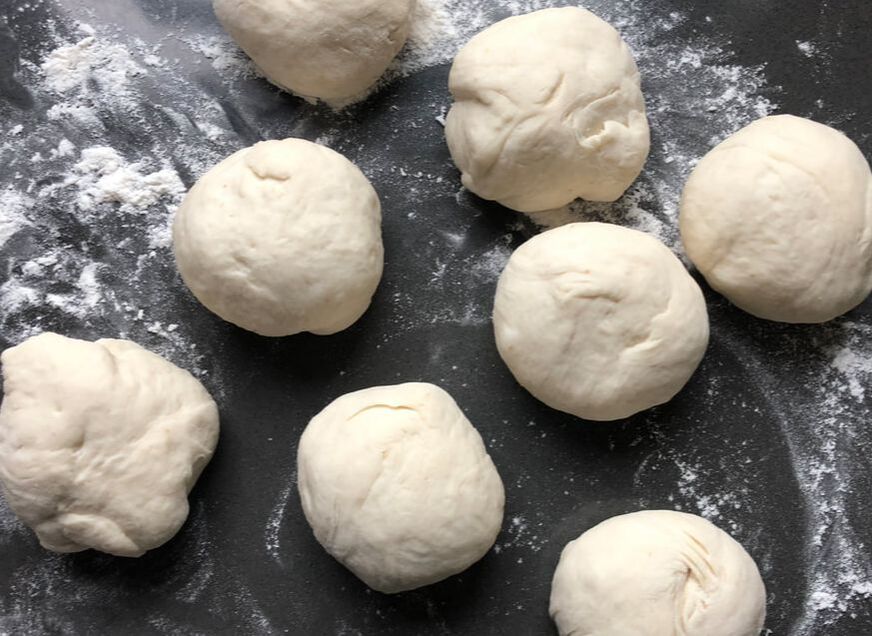
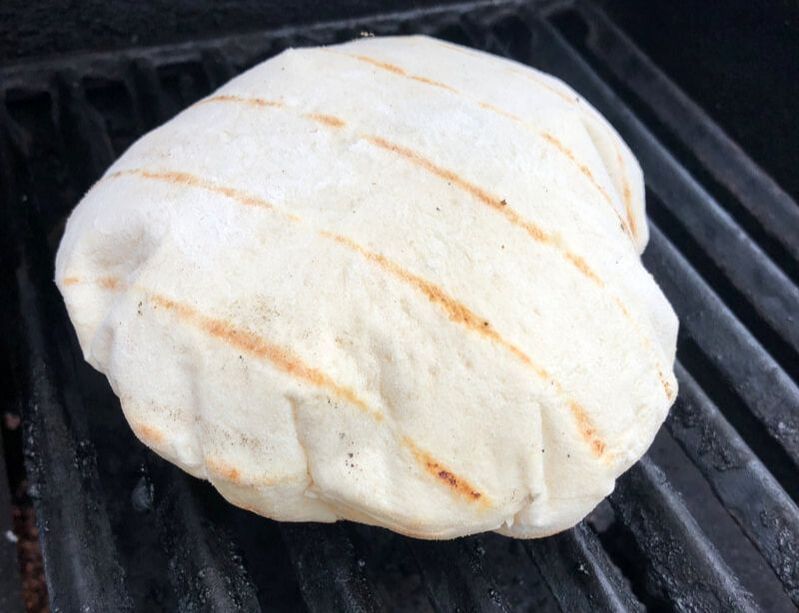
7. Heat BBQ grill until it's very hot (400+). Roll dough into rounds 1/4" thick by about 6-8". Place directly on the hot (clean) grill and watch carefully; turn when the bottom starts to brown and pita begins to puff (about one minute). Grill the second side.
8. Keep pita warm under a clean towel until all are cooked.
Tahini Sauce
Add about two teaspoons each of maple syrup and lemon juice to 1/3 cup tahini and mix.  Season with salt to taste.

Grilled Pita Bread

1 c. warm water
2 tsp. active dry yeast/instant yeast
1 tsp. granulated sugar or honey
3 c. unbleached flour, for a combo of unbleached and whole wheat, divided
1 tbsp. extra-virgin olive oil
1 1/2 tsp. salt
  1. Add yeast and sugar/honey to water in the bowl of a stand mixer (or large bowl, if doing this by hand) and let rest for 5-10 minutes to "proof". It should get frothy.
  2. Add oil and salt and mix until combined.
  3. Add 2 cups of flour and turn on mixer, letting run for about five minutes.  If doing by hand, knead, adding more flour as necessary to keep the dough from sticking to your hands.
  4. Slowly add more flour until dough is soft but not sticky.
  5. Place dough in an oiled boil, swirling to coat the top. Cover and let rise about an hour (until double).
  6. Turn dough onto floured counter and cut into eight. Shape pieces into balls and let rest 10 minutes.
Picture
Picture
2 Comments
Linda mcdonald
10/6/2020 10:43:38 am

Hi Cuz. Love the falafel recipe. I plan to try it.

Linda

Reply
Jean E
10/6/2020 11:36:51 am

They are so delicious!! Enjoy!

Reply

Your comment will be posted after it is approved.


Leave a Reply.

    This section will not be visible in live published website. Below are your current settings (click inside this section to edit the settings):


    Current Number Of Columns are = 2

    Expand Posts Area =

    Gap/Space Between Posts = 10px

    Blog Post Style = card

    Use of custom card colors instead of default colors = 1

    Blog Post Card Background Color = current color

    Blog Post Card Shadow Color = current color

    Blog Post Card Border Color = current color

    Publish the website and visit your blog page to see the results

    Picture

    Jean E. Pendziwol

    I live on the north shore of Lake Superior where I write books for kids and adults. I express love and care through food and have a particular fascination with bread! Join me as I explore the cultural significance of bread around the world and experiment with recipes for everything from quick breads to flatbreads, soudoughs and brioche. It promises to be a delicious journey!
    ​

    Categories

    All
    Breads Of All Kinds
    Grilling
    Hiking And Camping Food
    Holidays
    Pasta
    Salads
    Sweet Things
    Things To Do With Beans

    Archives

    April 2025
    August 2024
    October 2023
    September 2023
    October 2021
    September 2021
    June 2021
    April 2021
    March 2021
    January 2021
    October 2020
    August 2020
    July 2020
    June 2020
    May 2020
    April 2020

    RSS Feed

Proudly powered by Weebly